Sending results to Snyk
More than once you’ve been directed to run a snyk CLI command, and you may have noticed the text at the end of your CLI results:
Tip

  New: Share your test results in the Snyk Web UI with the option --report
Let’s send results to Snyk for viewing in the UI. At your command prompt, ensure you are authorized with Snyk by issuing the command below. In the setup steps, you were asked to get the API_TOKEN from snyk.io. See the Snyk setup page for those instructions.
snyk auth <API_TOKEN>Once you are authorized, we’ll re-run the same snyk command from before, with the extra parameter --report that sends the results to Snyk. But first, let’s undo our github changes because we actually want to see some of the issues we fixed.
git checkout main.tf
git checkout output.tf
snyk iac test --report
We should see the 3 medium vulnerabilties return, plus a link to Snyk for your web-based results:
Report Complete

  Your test results are available at: https://snyk.io/org/<the name of your organizatio>/projects
  under the name: http://github.com/gautambaghel/vulnerable-ec2
Copy-and-paste the link, or click through the link if your CLI supports it. When you navigate to Snyk you’ll arrive at a list of projects for your organization. If this is your first time using Snyk, you will only see one project entry. If you are an existing user, you will see the name of your project .
The image looks like the following:

As expected, the information on the screen matches the status of your working project. On the web UI, we add a little more context to help. In the view below, you also see the option to ignore the issue or create a Jira issue. The ignore feature is available on all Snyk tiers, including free. Jira integration, on the other hand, is availble on paid tiers.
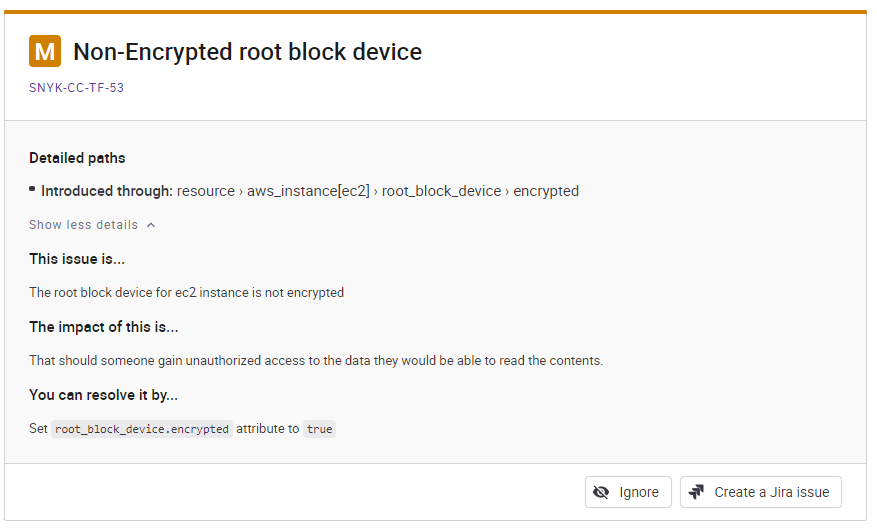
In the user interface, when you click on the Ignore button you are presented with choices. These include marking the issue as “Not Vulnerable” or “Ignore temporarily” or “Ignore permanently.” The intention of these choices is to let you configure Snyk to work within your desired workflow.
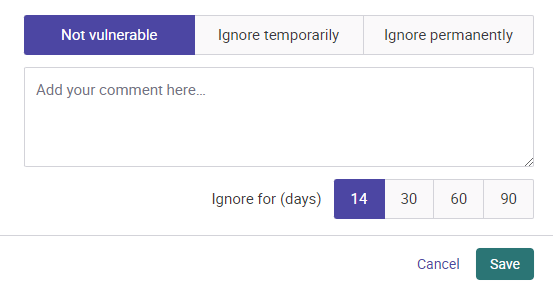
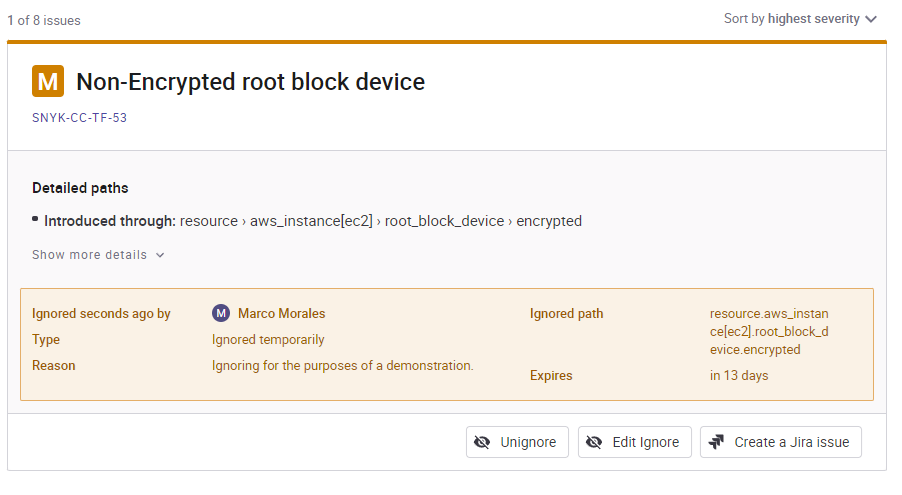
Let’s click on the Ignore Temporarily option and add a comment. When you save your selection, your number of vulnerabilities changes but the added onscreen filter of Ignored now shows you a count. When you enable that checkbox, you see your previous issue with an explanation of its Ignored status. From here you can edit the ignore condition, or exit the ignore state.
Next: Optional exercise
In the next section, we provide an optional exercise utilizing an EKS cluster.